Embarking on journeys with an electric scooter has become a staple in modern urban travel, offering a swift and green alternative to traditional transportation. As the adoption of electric scooters surges, riders are on the lookout for enhancements to make their journeys more comfortable and enjoyable. A pivotal addition in this quest for comfort is the scooter seat. This article aims to guide you through the intricacies of selecting the perfect seat attachment for your electric scooter, ensuring your rides are as comfortable as they are efficient.
Key Takeaways:
- Importance of selecting the right seat for your electric scooter.
- Step-by-step guide to assembling a scooter seat.
- Factors to consider when choosing a seat attachment.
- Tips and recommendations for a comfortable ride.
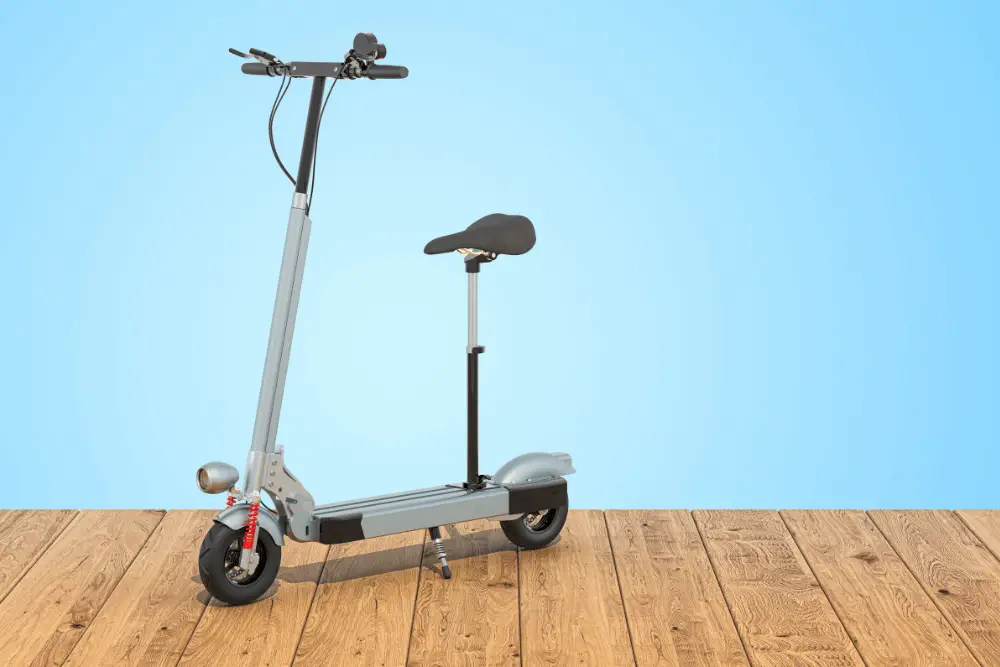
Best Seat Attachments for Electric Scooters
No products found.
Understanding the Basics
Electric scooters come in various designs, with some models designed for standing and others for seated riding. Adding a seat to your scooter can significantly enhance comfort, especially for longer rides. Here are some benefits of having a seat:
- Enhanced Stability: A seated position offers better balance and stability.
- Reduced Fatigue: Sitting reduces strain on the legs and back.
- Versatility: Some scooters allow riders to switch between seated and standing positions.
Step-by-Step Guide to Assembling an Electric Scooter Seat
Assembling a seat might seem daunting, but with the right guidance, it’s a breeze. Here’s a step-by-step guide:
1. Choose the Right Seat
Before diving into the assembly, ensure the seat is compatible with your scooter model. Seats come in various shapes and sizes, so always check the manufacturer’s compatibility information. Consider factors like:
- Installation Ease
- Cushioning Comfort
- Adjustability
2. Gather the Necessary Tools
To ensure a smooth assembly process, gather essential tools. Typically, you might need:
- Wrench
- Hex keys
- Screwdriver
3. Attach the Seat Bracket
The seat bracket connects the seat to the scooter. Here’s how to attach it:
- Locate the mounting holes on the scooter frame.
- Remove any existing hardware.
- Align the bracket over the holes and secure it using the provided screws or bolts.
4. Attach the Seat Post
The seat post connects the seat to the bracket. Here’s the process:
- Slide the seat post into the bracket.
- Ensure it’s aligned and set to the desired height.
- Tighten the bolt or clamp to secure the post.
5. Attach the Seat
Now, it’s time to attach the seat to the post:
- Align the holes on the seat with those on the post.
- Secure the seat using the provided bolts or screws.
6. Test Ride
After assembly, take your scooter for a spin. Adjust the seat height if necessary and ensure stability during the ride.
Factors to Consider When Choosing a Seat Attachment
When selecting a seat, consider the following factors:
| Factor | Description |
| Stability | Ensure the seat offers good balance and doesn't wobble during rides. |
| Comfort | Look for cushioned seats that offer comfort during long rides. |
| Adjustability | Seats with height adjustability can cater to riders of different heights. |
| Shock Absorption | Some seats come with shock absorbers for smoother rides on bumpy terrains. |
| Price & Quality | Balance between your budget and the quality of the seat. |

Advanced Tips and Recommendations
At Electric Scooter Guide, we always aim to provide our readers with the best recommendations. Here are some advanced tips:
- Upgrade Your Seat: If you’re unsatisfied with your current seat, consider upgrading to a more comfortable model.
- Best Brands: Some reputable brands offer high-quality seats designed for comfort and durability.
- Maintenance: Regularly check the seat’s bolts and screws to ensure they’re tight. Clean the seat to maintain its appearance.
Choosing the Right Seat Kit
Selecting the right seat kit is paramount to ensure compatibility with your electric scooter’s make and model. Here are some factors to consider:
| Consideration | Description |
| Compatibility | Ensure the seat kit matches your scooter's make and model. |
| Brands | Popular brands like Razor, Segway, and Ninebot offer reliable seat kits. |
| Specifications | Always read the manufacturer’s specifications and recommendations before purchasing. |
Gathering the Necessary Tools
Having the right tools at your disposal can make the installation process smooth. Here’s a table of commonly required tools:
| Tool | Purpose |
| Hex keys or Allen wrenches | For tightening bolts and screws. |
| Screwdriver | For attaching the seat. |
| Socket wrench | Might be needed depending on the seat kit. |
Installation Steps
Following the correct steps ensures a safe and secure seat installation:
1. Remove the Existing Stem Cap
The stem cap, located at the top of the steering column, needs to be removed. Use your hex keys or Allen wrenches for this.
2. Install the Seat Post
The seat post connects the seat to the scooter. Insert it into the steering column and secure it using the provided tools.
3. Attach the Seat
With the seat post in place, attach the seat. Ensure it’s securely fastened to avoid any wobbles during rides.
4. Adjust the Seat Height
For optimal comfort, adjust the seat height. Most kits come with a quick-release mechanism for easy adjustments.
FAQs
Q: Can I switch between a seated and standing scooter easily?
A: Yes, many modern electric scooters allow riders to switch between seated and standing positions, offering versatility.
Q: How do I ensure the seat I buy is compatible with my scooter model?
A: Always check the manufacturer’s compatibility information. Brands like Razor, Segway, and Ninebot provide detailed specifications for their seat kits.
Q: Is it difficult to install a seat on an electric scooter?
A: With the right tools and guidance, installing a seat is a straightforward process. Always refer to the manufacturer’s instructions for a smooth installation.